

Whisk yourself away to the sweet delights of homemade iced buns! Make your own sweet finger rolls for the fluffy bread base, and give them a crowning coat of icing with sprinkles (if you desire).

These iced finger buns are a charming addition to a British afternoon tea or a sweet treat for making with the kids.
Our tried and tested iced buns recipe, will transport you back to your childhood days and bring smiles to your family's faces.
Jump to:
How to make Iced Finger Buns
This blog post will cover all the equipment and ingredients, with detailed instructions. If you are in a rush, use the iced buns recipe card below.
📖 Step by Step Recipe

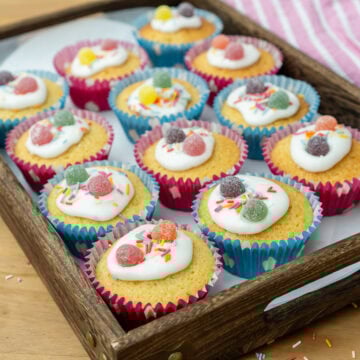
Iced Buns with Sprinkles
Equipment


Ingredients
Sweet Finger Buns
- 300 g Strong White Bread Flour
- 50 g Caster Sugar
- 7 g Dried Yeast - Instant Yeast
- ½ teaspoon Salt
- 50 g Butter - Unsalted
- 1 large Egg
- 120 ml Milk - Whole or Semi Skimmed
Icing
- 180 g Icing Sugar
- 2 ½ tablespoon Milk - Whole or Semi Skimmed
- Food Colouring - optional
- Sprinkles - optional
Instructions
- Cut the 50 g Butter into small cubes and leave at room temperature to soften.

- Weigh out the following dry ingredients and place them into a mixing bowl (or the bowl of a stand mixer) together. 300 g Strong White Bread Flour, 50 g Caster Sugar, 7 g Dried Yeast, ½ tsp Salt.

- Stir to combine ingredients.

- Warm 120 ml Milk in the microwave for 30 seconds (Can be warmed on the hob instead.). It needs to be approx 35℃ warm, to the activate yeast. Do not overheat the milk.

- Add the warmed milk, softened cubes of butter and 1 large Egg to the dry ingredients. Follow the instructions below for the stand mixer option or hand mix option.

Hand Mix
- If you do not have a mixer, use a silicone spatula to combine ingredients together. When it gets too hard to stir, use your hands to knead instead. This will take approx 15 mins

Stand Mixer
- Mix all the ingredients together at medium speed with the bread hook.

- It all forms together into a thick sticky dough, this will take approx. 8 minutes.

- Clean and lightly flour your worktop. Remove the sticky dough from the mixer. Use your hands knead the dough into a neat ball.

- Place into a lightly oiled bowl. Wet and wring out a clean kitchen tea towel and place it over the top of the bowl.

- Place the dough somewhere draft-free at room temperature (ideally above 20℃ but below 30℃) This is the dough resting period - rest for approx 45 minutes.

- Clean and lightly flour the surface. Remove the dough from the bowl and knead for 1 minute.

- Roll and stretch the dough into one even cylinder approx 16 inch long.

- Now divide the dough into 8 equal pieces - 2 inch each.

- Roll each piece into a finger shape. They will look small at this point! Don't worry they rise!

- Place a sheet of parchment onto a baking tray and place the fingers onto the tray, leaving a small space between each one. They need room to grow.

- Cover with cling film or a proofing bag if you have one?

- Now, find somewhere warm in your home. The temperature of the area you are proofing the dough will affect the time it takes to rise. We use our airing cupboard which is 40℃, this helps give a quick 30 minute rise. If you do not have a warm place it will take longer upto 2 hours.

- You will know when they are ready as they will have grown and all be touching! Place in a preheated oven at 180℃ fan/ 200℃ / 400℉ / Gas Mark6

- Bake for approx 10 minutes, until lightly golden on top.

- Transfer to a wire rack to cool

- Pull buns apart once they are cool enough to handle to help cool quicker. wire rack on top of a clean tray to catch the loose sprinkles later.

- Once they have cooled completely you can ice the finger buns

- In a large shallow bowl mix 180 g Icing Sugar with 2 ½ tbsp Milk.

- Stir to combine, optional add Food Colouring if desired.

- Dip the top of one bun at a time into the icing.

- If adding Sprinklesdo so after each bun has been dipped, before the icing dries!

- Allow the icing to firm up slightly and serve!

Video
Nutrition
Why not make a day of baking and make our Chocolate Fairy Cakes and Rock Cakes too.
Equipment
Ensure you have the following tools at the ready
- Stand mixer - with dough hook
- Mixing Bowl
- Baking Tray
- Tea towel
- Wire rack
- Dough knife
- Jug
- Parchment Paper
- Whisk
- Silicone Spoon

Ingredients
Lets look at the ingredients needed to make these iced finger buns.

Substitutes
Finding a specific ingredient difficult to source? Do not worry; this iced buns recipe is flexible.
Flour
If you don't have strong white bread flour, you can use plain flour (all-purpose flour), but it will change the texture of your iced finger buns.
Strong white bread flour has more protein, which helps develop gluten, giving the buns a chewy texture and better rise. With plain flour, your buns will be softer and less structured, which might actually be nice if you prefer a tender crumb.
For a happy medium, try a mix of half strong white bread flour and half all-purpose flour. You'll get buns that rise well with a softer texture, balancing bread roll chewiness with cake softness.
Milk
We add milk when making our iced finger bun recipe, contributing to the bread dough richness and ensuring the sweet buns have a golden brown exterior and a soft, fluffy interior. Making the iced buns more luxurious than if they were made with water.
However, if milk isn't an option or if you're looking for a lighter alternative, substituting water is perfectly feasible. The substitute may have a slightly chewier texture and a less rich flavour, handy for those with dietary restrictions.
Yeast
For this recipe, we've chosen to use instant yeast (also known as dried yeast), which is perfect for beginners and those looking for convenience. Instant yeast can be directly mixed with the flour, removing the need to dissolve it in water or milk, which is often required for active dry yeast.
You'll need to adjust the quantity if you prefer fresh yeast. Multiply the amount of dried yeast by three for the equivalent amount of fresh yeast. Additionally, fresh yeast must be dissolved in a little warm milk from the recipe before being added to the flour, so remember to account for this extra step in your preparation.
Optional Ingredients
While the basic white iced bun are a delight, feel free to add a personal touch with any colour food colouring added to the icing. Or watch the kid's joy for a sprinkled iced finger bun! Check out sprinkly.co.uk for some beautiful sprinkles!

Ready to make your own whimsically delightful iced finger buns? In the iced bun recipe card above, we've detailed every step to guide you through the process of creating these sweet, fluffy treats from scratch.
How to Make Dough
Cut the butter into cubes to speed up the time it takes to reach room temperature.

Add strong white bread flour, caster sugar, dried yeast, and salt to a mixing bowl.

Stir the dry ingredients evenly before adding the next ingredients.

Gently warm your milk to approx 35℃. Avoid overheating, as this could destroy the yeast.

Hand Mix
If you do not own a stand mixer, add the butter milk and egg, combine the ingredients with a spatula until too thick, then knead by hand on a lightly floured surface for about 15 minutes until a sticky dough forms.
Stand Mixer
Add the warm milk, egg and softened butter it to the bowl.


Use the bread dough hook on medium speed with a stand mixer for roughly 8 minutes.

Transfer the sticky dough to a lightly floured surface and knead the soft dough into a neat ball.


It is ok that the dough is still sticky at this point.
Rest Dough
Lightly grease a bowl with oil or butter, add the dough into the oiled bowl.
Wet a clean tea towel and wring it out, place over the bowl and allow it to rest at a snug room temperature, free from draughts, for about 45 minutes.

Shaping Dough
Once your dough has rested, knead it briefly onto a lightly floured surface until smooth and elastic. It should not be sticky anymore. If it is still too sticky, add extra flour to the surface.

Roll it into a cylinder about 16 inches long.

Divide it into 8 equal pieces. Each piece 2 inches.

Roll each piece into a long finger shape. They look small at the moment. But will grow!

Lay them out with space in between on a baking sheet lined with parchment.

Proofing buns
Cover them, and find a warm place in your home for the dough to rise.

We like to use our airing cupboard, which is 40℃, which helps give a quick 30-minute rise.

If you do not have a warm place, it will take longer upto 2 hours. Once they have roughly double in size and nestled snugly against each other they are ready to bake.
Oven Temperature and Time
Preheat your oven to 180℃ (fan) / 200℃ / 400℉ / Gas Mark 6 for about 10 minutes, or until a slightly golden brown.


Cooling
After baking, transfer your finger buns to a wire rack, once cool enough to handle encouraging them apart to aid the cooling process.


Make sure the buns are cool before icing.
Icing Buns
Mix the icing sugar with milk in a large shallow bowl and consider adding a splash of colour if you want to. Whisk together into a thick paste.


Individually dip the top of each bun into the icing, place on wire rack.


Add sprinkles immediately if choosing to use them. Before the icing firms up.

Wait for the icing to set and serve.

How to Store Iced Buns?
Best consumed fresh, iced buns can still last for up to 2 days when stored in an airtight container at room temperature, preserving their optimal softness.

If stored in the fridge, they can keep for up to 5 days, but it is best to bring them back to room temperature before serving for the best experience.
Freezing
If you wanted to make a bulk batch you can freeze the finger buns after they have cooled, before icing. Add buns into a freezer bag then freeze for up to 3 months.

To defrost, let the buns come to room temperature, then make some icing to top them with.
More British Baking Recipes
We have plenty more British cake recipes you will love!


What are iced buns
A classic British Bakery treat, iced buns are a simple, sweet bread adorned with a layer of icing. Their light texture and melt-in-the-mouth sweetness can be attributed to the perfect combination of sweet dough proofing and baking.
These fluffy buns are otherwise known as swiss buns or iced fingers and are sometimes filled with strawberry jam/ raspberry jam and/or fresh cream.


Steven says
We made this recipe at the weekend with the kids, it was great fun making them and they tasted amazing 🙂
Luke and Kay says
Thank you for choosing our Iced buns with sprinkles recipe, Steven! We're thrilled to hear that you and your kids enjoyed making them together. Cooking should always be a fun and interactive experience, especially when it comes to spending quality time with family. It's also wonderful to know that the end result tasted amazing! 🙂
Amy Liu Dong says
Making this is the most awesome and satisfying 2 hours of my life! It is delicious, the sweetness of it is just right and the other elements compliments each other well!
Luke and Kay says
Hi Amy, thank you so much for taking the time to share your positive experience with our Iced Bun Fingers! We are delighted to hear that you found making this recipe to be a fulfilling and delicious experience. It means a lot to us that our readers appreciate the balance of flavours in our recipe. Thank you again for your kind words and support, we look forward to delighting you with more of our culinary creations. Happy baking! 🙂